Enjoy the advantages of solar energy for hot water, electricity or heating your pool. +34652 97 69 15 / +34 925 710 433
All in solar energy and save energy Blog with questions and answer
Blog with questions and answer

You will found:
- Articles about solar energy
- Questions about solar energy
- Answer about solar energy.
How the installation of solar panels is carried out
Next we will proceed to inform you of the series of steps that must be carried out in order to mount your photovoltaic solar panels. Bear in mind that this is a meticulous process, which must be carried out with the utmost care by the responsible technician, thus guaranteeing a good functioning of your system and avoiding major problems in the future.
First step: How to mount the photovoltaic installation brackets
To begin with, you will need to place the supports for the solar panels on top of the roof before placing the panels and not after. Depending on the type of roof and its inclination, there may be a variation in the kind of structure used. An example of this could be that the support structure may not be the same in a roof where the modules are placed coplanar to it as one that is flat in which its modules will be inclined, thus obtaining the maximum possible efficiency. Furthermore, the structure should not be weighed down and the well-known sail effect should be avoided, which consists of being sure that the panels and the structure will not fly off due to the effects of the wind.
Step Two: Attach the Cover and Solar Panels
After having the structure positioned correctly, you must then fix it to the roof to be able to put the photovoltaic panels on it. Depending on the type of roof and the incline you have, you can carry out this process in different ways.
The roof is usually inclined, in Peru for example it is usual for the roofs to be inclined between 10º and 30º, thus favoring the performance of its installation. The material from which it is usually made is the Arabic type tile, although there are also different cases such as tiles covered or covered with asphalt fabric, tiles made of slate, among other materials. Depending on the cover on which the panels are to be anchored, the type of support used may vary.
When you anchor the structure correctly on top of the cover, you must position the modules and fix them to it, interconnecting them with each other, in order to finish the work by connecting them to the inverter.
Step Three: Connect to Solar Inverter
To correctly connect the panels, we will have to do it in series between the solar panels of the same row or string. We will carry out the interconnection in parallel always depending on the configuration of panels and inverter. To make the connections we will use the so-called MC4 connectors, we can do it in parallel or directly from the inverter. When making the connections, they have to be perfectly fastened since if we make a bad connection, this will have a negative effect on the total performance of the photovoltaic solar installation, leading to problems such as the so-called hot spots that can also affect the power. structure and composition of the photovoltaic solar panel.
So the purpose of electricity generation by solar modules is to reach the inverter.
The last of the steps to be carried out will be the parallel connection that we will make directly in the inverter, thus giving the part of the direct current (DC) installation completely. So we will conduct all the energy captured by each solar panel through solar radiation in the form of electric current to the reverse. This will be located near the electrical panel of the house.
A recommendation to follow is the location of the inverter, it should be placed away from direct sunlight and some type of heat source, we should not locate it in the south area of the house since if it heats up, its performance will be affected. Therefore, it is advisable to install it inside the house, in case of not being able to do so, we will look for a place protected from inclement weather, either due to heat or rain and wind.
The main function of the inverter is to transform the energy it receives continuously into alternating current, which is what we use on a daily basis in our homes. The change is generated by the investor automatically, with a specific magnitude and frequency, all this will be done so that we can enjoy it without any concern.
The last step will be to connect the inverter to the electrical panel, as if it were a differentiated circuit of the house, with this we finish the part of the alternating current (AC) installation
Step four: Storage of excess energy in batteries
If we decide to store the energy that we generate with the panels, apart from knowing how to install the modules in the home, you are also interested in knowing how to connect the accumulators.
The inverter that we have to acquire has to be hybrid, capable of managing the charging and discharging of the batteries, these with the most expensive and delicate elements of the photovoltaic solar system. The storage capacity of the batteries will depend on the demand and the solar photovoltaic system installed.
Depending on the voltage and capacity required, it can be done in more than one way. The connection of the batteries can be done in parallel, in series or in series and in parallel, of course it is always with the same batteries. If we choose to put the batteries in parallel, we will double their capacity, but we will maintain the same voltage. In case we do it in series, the results that we will obtain will be the opposite, we will maintain the capacity of the batteries but we will double the voltage of them. If we opt for the third option, in series and parallel, we will double the capacity and voltage of the batteries.
conclusion
In summary, we can cite the steps to follow to carry out a solar panel installation:
- Install the structures that support the panels.
- We fix the covers.
- We install the solar panels.
- We make the connection of the system with the inverter.
- We connect the inverter with the electrical panel.
- We connect the batteries in the case of an isolated installation.
Now that we have briefly detailed how solar panels are installed, from panels, inverter and batteries, you must bear in mind that it is a laborious and complicated job for those who do not have knowledge in the matter, that is why we advise you to always You go to professionals in the sector and with experience in the field of photovoltaic solar energy.
-----------------------------------------------------------------------------------------------------------------------------------------------------------------------------------------------------------------------
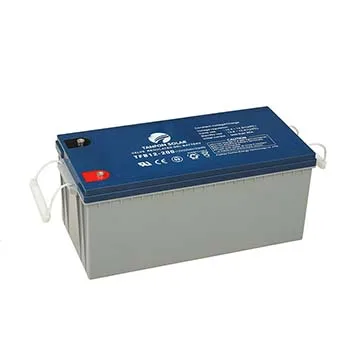
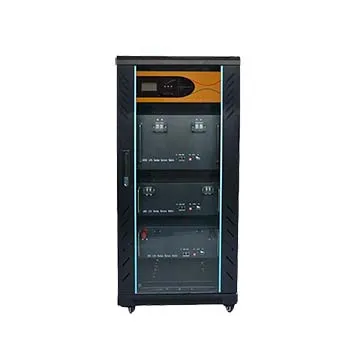
For off-grid solar system, it can install gel battery and lithium battery,what is the difference between the two batteries? how to choose the battery?
|
Product |
Gel battery |
Lithium battery |
|
Picture |
|
|
|
The number of cycles |
DOD 70% cycles 1500 times In order to protect battery life, only 70% discharge is allowed |
DOD100% cycles 3000 times Can be 100% deep discharge |
|
Capacity comparison |
100AH gel battery = 70AH lithium battery capacity |
|
|
Service life |
6-8years |
10-12years |
|
System installation picture |
|
|
|
Package |
Large volume heavy weight high freight |
Small volume light weight saving freight costs |
|
Installation |
Series and parallel connections are more complicated and require large space |
Connect one wire each for the positive and negative poles; easy to install and save space |
|
Actual installation picture (See the battery section) |
|
|
|
Free warranty time |
2 years Ship the new for service |
3 years Ship the new for service |
|
Price |
Low |
high |
|
Which one is better? |
Decide according to your budget and usage requirements, the one that suits you is the best |
|


